Getting started with a new programming platform can be daunting! Follow the steps below to download R & RStudio, and you’ll be coding like a pro in no time.
Side Note: R is an open-source software so everything is free! The R software is free, the RStudio IDE is free, and you’ll find lots of great free tutorials online. There are some paid courses that may be worthwhile, but my advice is to get as far as you can with the free resources since they are so widely available.
Download R
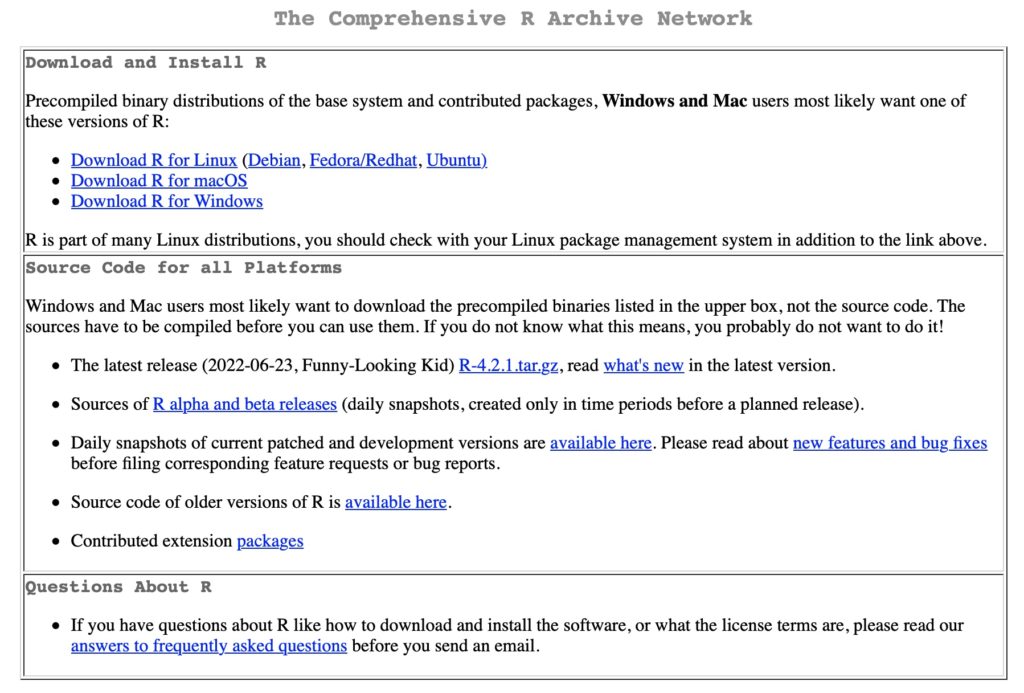
So first thing’s first, you can download R directly from R’s website. It can be a little complicated to go through some of the options, so here are the direct links to download on Windows and MacOS. If you go this route, you can skip to the next part.
If you have another operating system or would prefer more detailed options, you can select “download R” from the main page and choose your “CRAN mirror.” This will be the link of the location closest to you in the list. For instance, if you’re closest to Texas and click on Revolution Analytics, it brings you to a page where you can download the software for Windows, macOS, or Linux. Click on the option you need and follow the download instructions.
Download & Setup an IDE (RStudio)
After you have downloaded R and gone through the installation steps, you’ll want to download an IDE (integrated development environment) as well. This is just a console you can use with R to make your life a little easier. It has a user-friendly setup, adds customization options, allows you to integrate other programming languages…the list goes on. There are many options out there, but I prefer the tried and true RStudio. Here are the options to download RStudio, and I suggest installing the desktop version. I haven’t used the server version so I can’t vouch for it, but the RStudio folks run an excellent service so I’m sure it’s great if that better suits your needs.
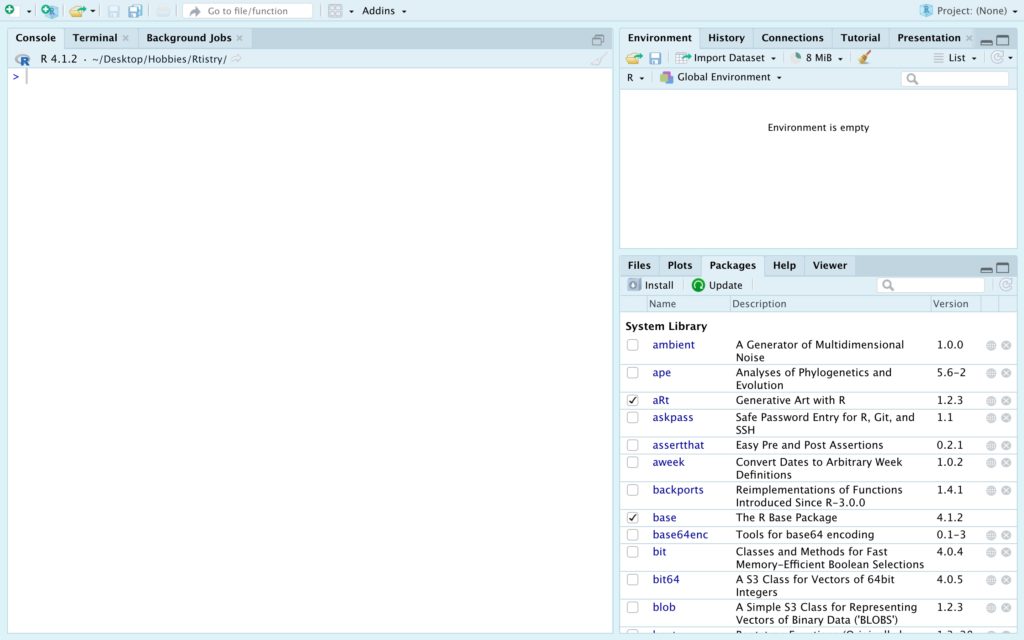
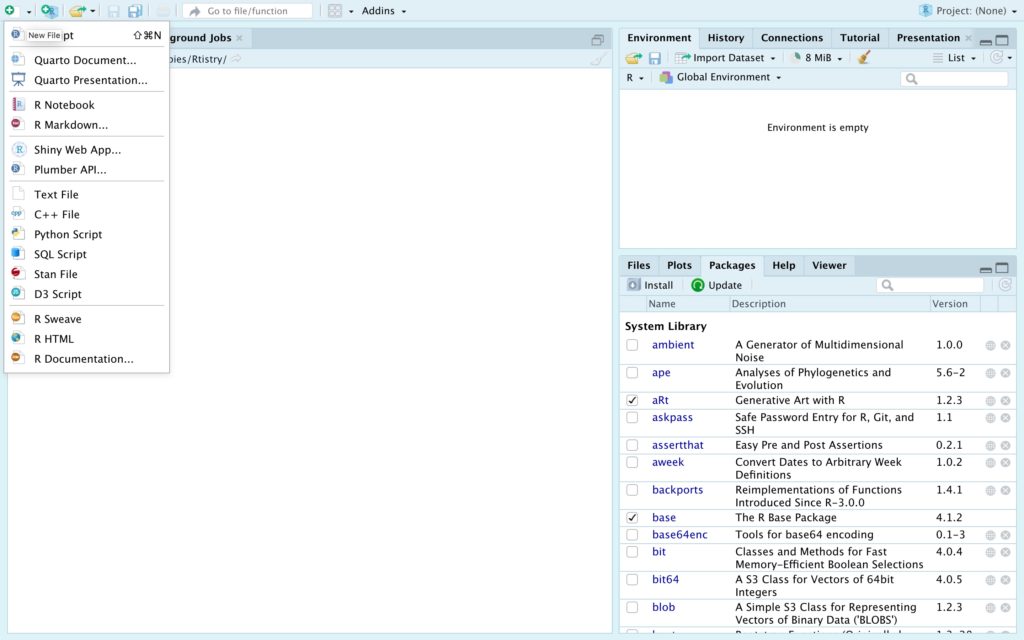
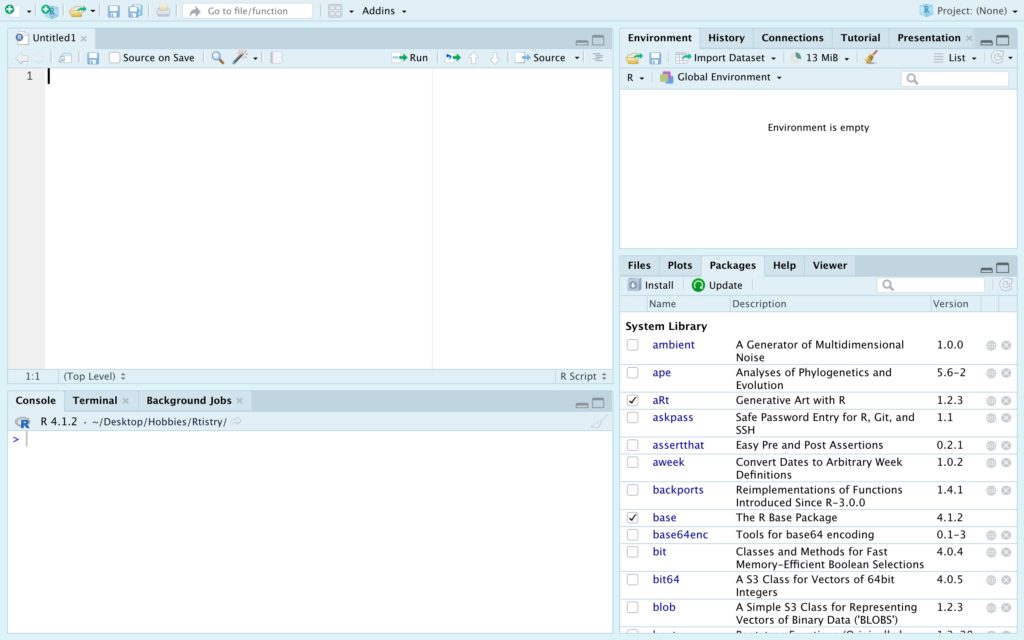
Above is an example of your RStudio interface. Some people will start practicing directly in the console, but I prefer opening a script that I can save if I need to (shown below). You never know when you’ll output a brilliant, reusable code chunk you’ll want to hold onto forever! And losing important work is the fuel of nightmares. I had a junior high computer teacher who would yell at us to “save and save often!” so much that it’s permanently etched into my brain.
Walk-through of RStudio
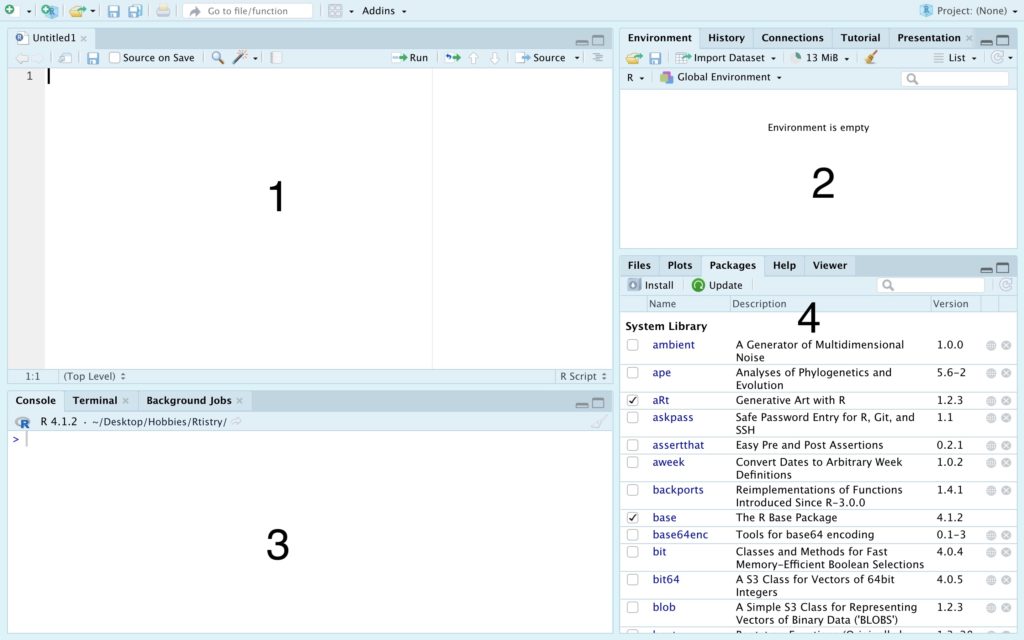
- Editor: On the top left you have the editor. This is where you can type your code so that you can save it and use it again. It’s best practice to use a script vs. just the Console so you can reuse pieces of code and come back and make adjustments if needed. As a bonus, you’ll also have documentation of things that have worked AND (sometimes more importantly) things that haven’t.
- Environment: Your environment is where your data frames and functions are stored. When you import data and make adjustments, you can save them here by using the “<-” operator. More on that here.
- Console: The console shows the progress of the code as it runs. If there are errors, it will stop running and give a quick description of the error. You may be prompted to type a “yes”, “no”, “1”, “2”, etc. for a package install or update. You can also run a quick fragment here that you don’t care about saving like view(df) or install.package(“package”).
- Files/Plots/Packages: This pane shows the files in your directory, the most recent plot that you’ve created, and all of your packages. There’s a button to install/update packages here as well. If you click on a package, the Help tab will open with an overview, tips, and a list of all of the functions in the package (which really comes in handy while learning!).
Now you’re all set up! If you’re stuck on what to do next, check out w3schools for some excellent, beginner-friendly tutorials. (That is not an ad, I genuinely LOVE their website.) And please comment below if you have any questions about the setup process or advice for newbies!